


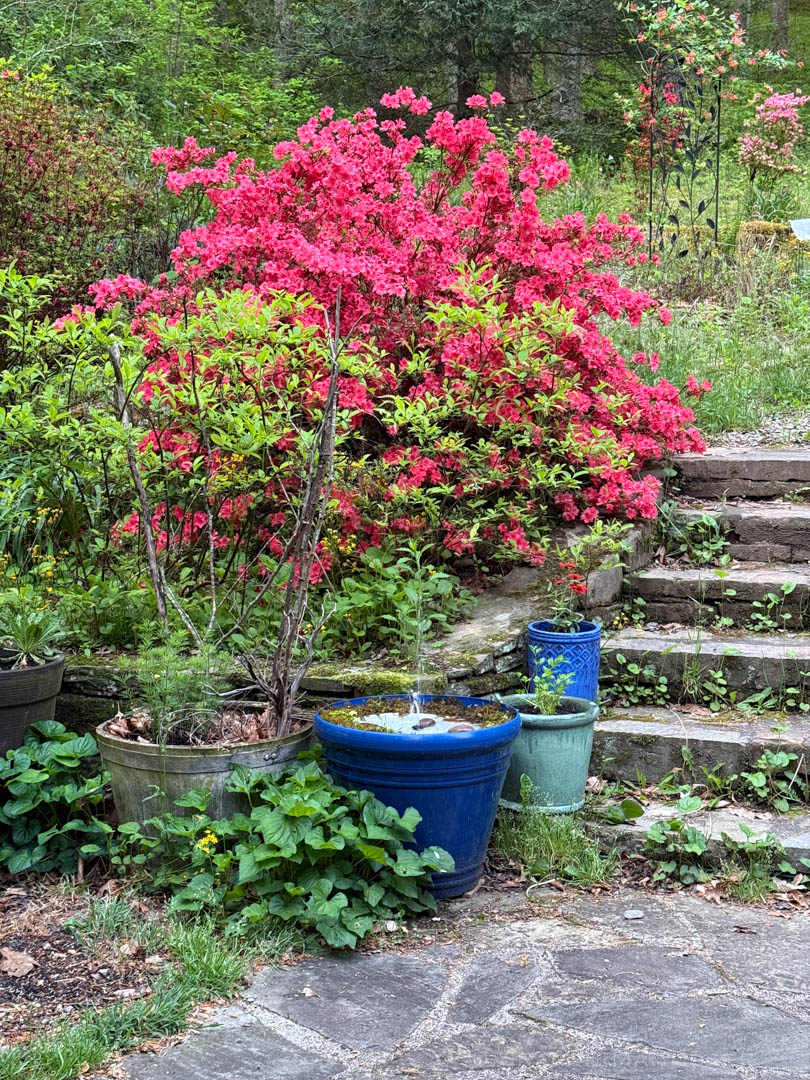
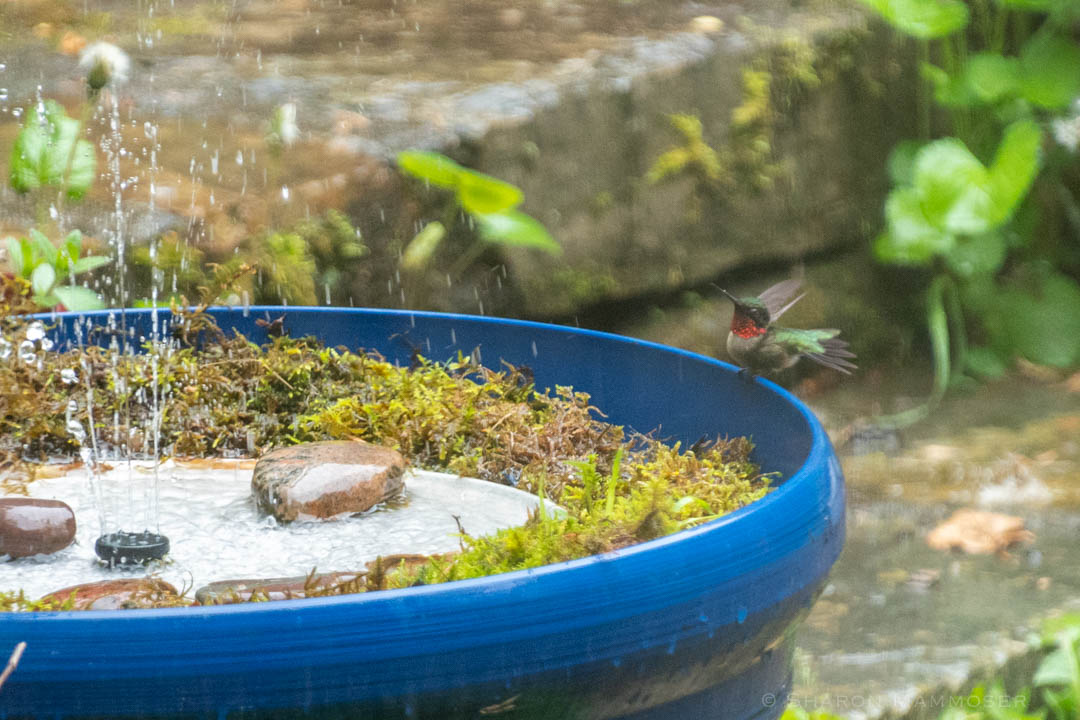
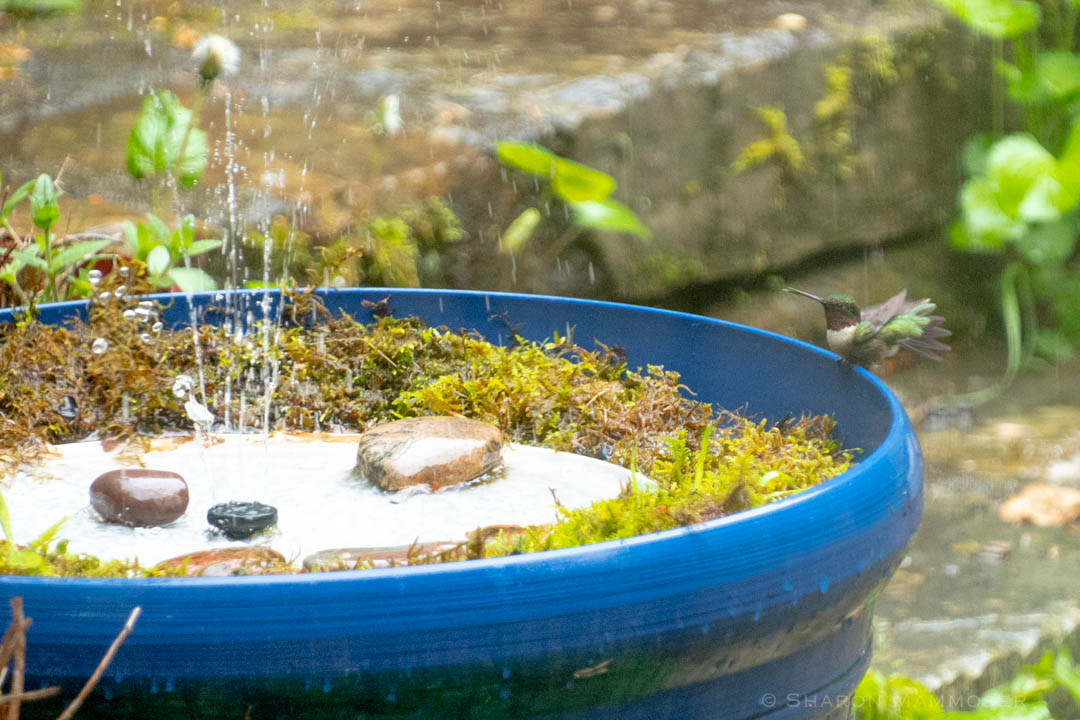
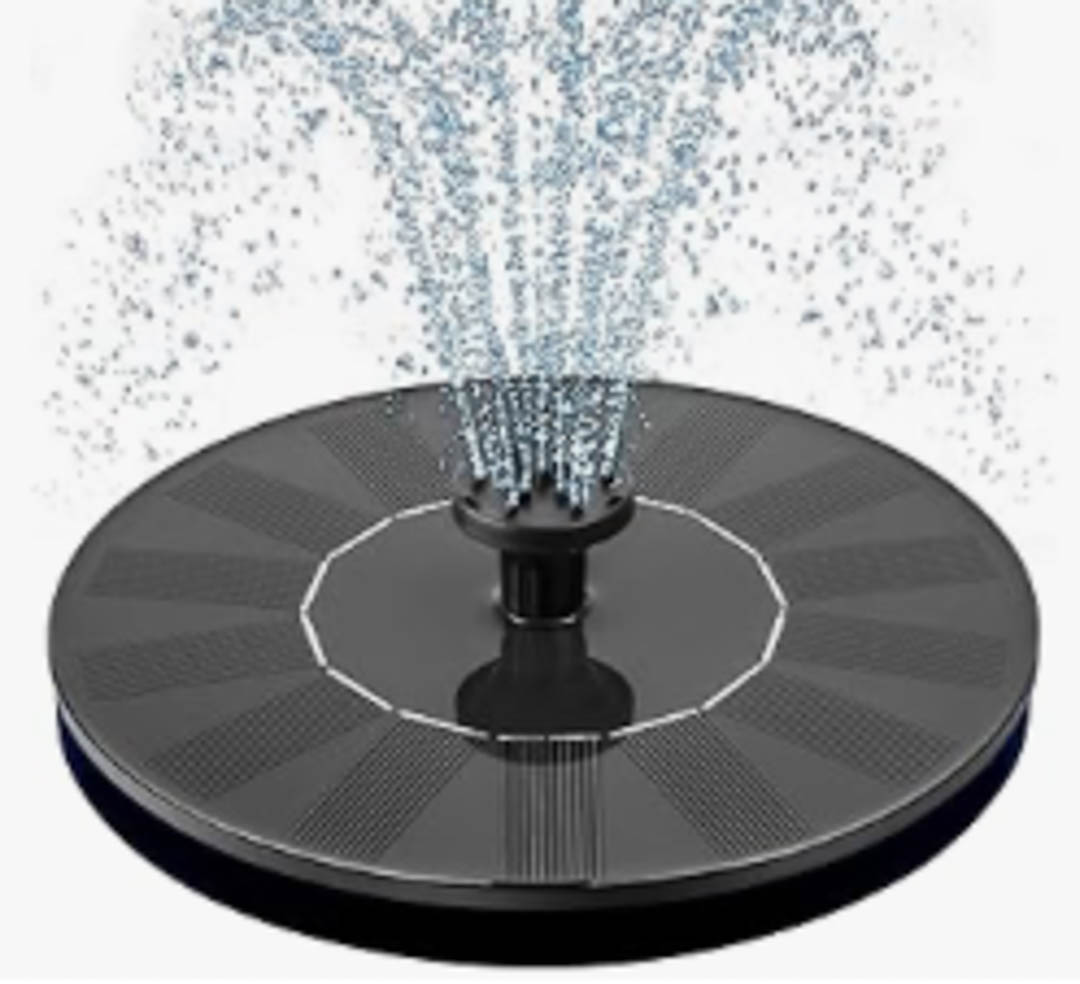
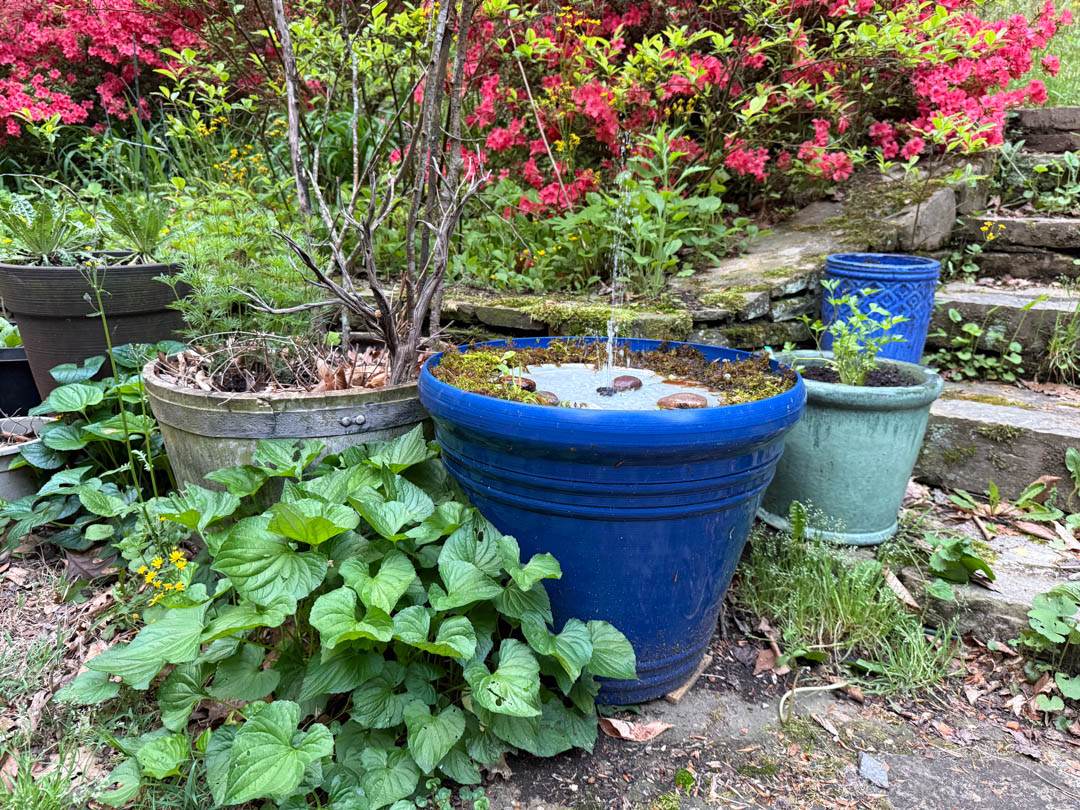
After a lot of trial and error, I’ve finally perfected my hummingbird water park! I’m on version 3, here to tell you what I’ve learned to save you from making the same mistakes. Wondering what a hummingbird water park is and why you would want to make one? A hummingbird water park consists of very shallow water on top of a tray with a spray of water in the middle. Unlike a solar fountain that needs sun to work, and often throws all of the water outside of the bird bath, this hummingbird water park runs constantly, no matter the weather because it is powered by a small pond pump, plugged into an outlet. Hummingbirds LOVE dashing through mist or water spray, and love a nice cool shower. They sit down on the wet rocks, and even get right in the water for a bath. I watch a male hummingbird use the fountain every morning, multiple times. He seems to love it, using it over and over again starting when it’s first getting light outside. It is a joy to watch!! They can be seen several times each day sitting on the rim of the pot, with water spraying on and around them. And as a bonus, warblers and other birds are attracted to the sound and often come to investigate, get a drink, or even take a bath. It’s a very fun, and pretty inexpensive way to attract more birds.
I learned a lot in my previous two versions. For instance version number two had a flower pot with a diameter of 15 inches. This proved to be too small, as my pump often threw the water out of the pot, and I was having to refill it many times each day. Version number one looked amazing because I glued on colorful rocks and even tiles in some places, but got filled with algae and became slimy in no time, was hard to clean, and difficult to adjust. The water often sprayed out of the pan, and the spray was often too forceful and the birds didn’t like it.

Version number 3 fixed all of those mistakes, thankfully. The pot has a diameter of 21inches, the spray is soft and in varying heights, but throws the water in the pot most of the time (on SUPER windy days, some spray does fall outside of the pot, but it’s not enough to have me refilling it multiple times per day.) I can keep the water on the tray shallow enough that the hummingbirds feel safe enough to sit in it and take a bath! The stainless steel of the pizza tray is easy to keep clean– I can clean it just like my bird baths, with a soft brush.
Here’s what materials you will need to create this:
- Large plastic flower pot– mine has a diameter of 21 inches. This is just about perfect. Choose a pot that is low and sturdy, with a natural lip near the top. This is where the corrugated plastic will sit and fill with water. It must be plastic because you have to drill in the top for the pump plug to fit out and connect with the extension cord.
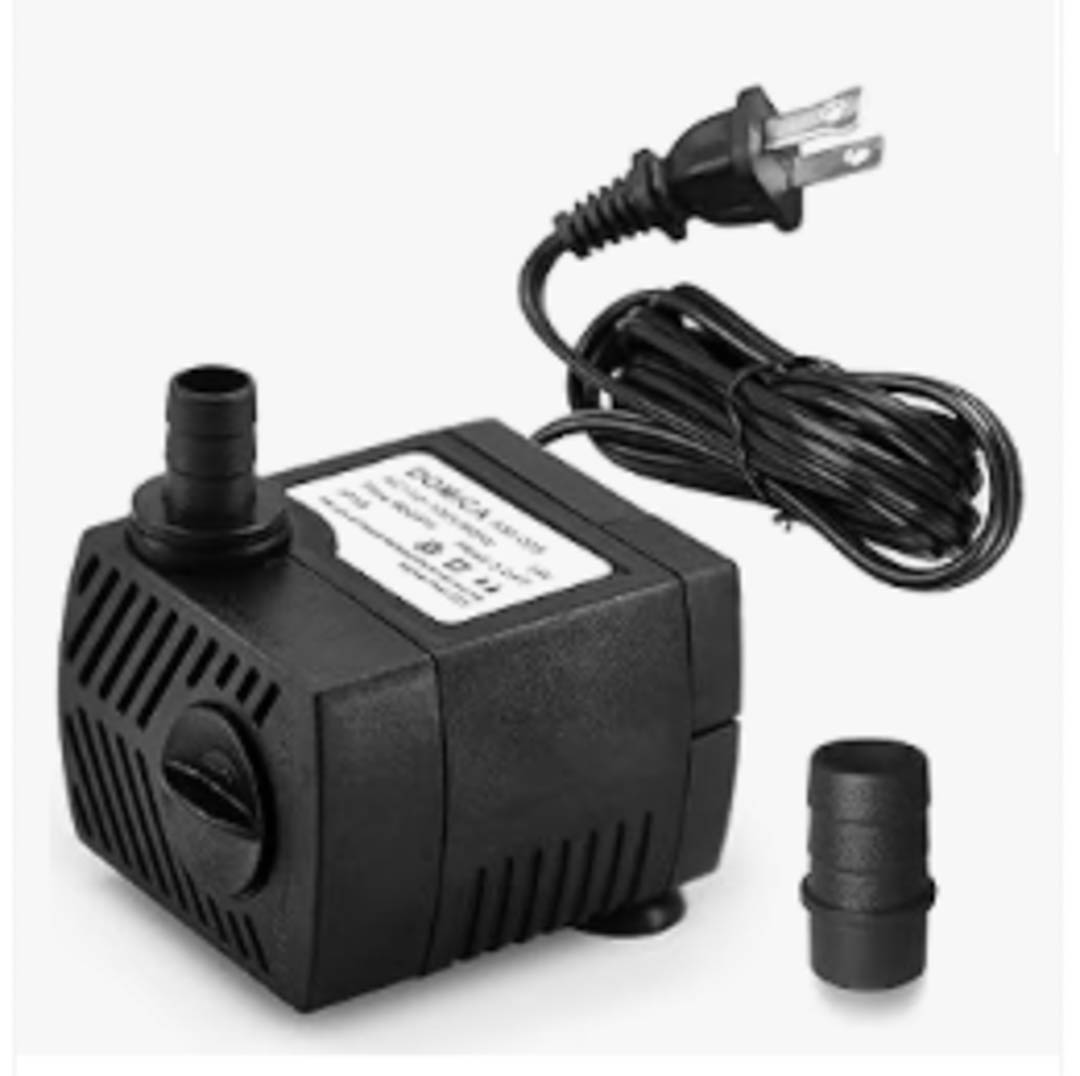
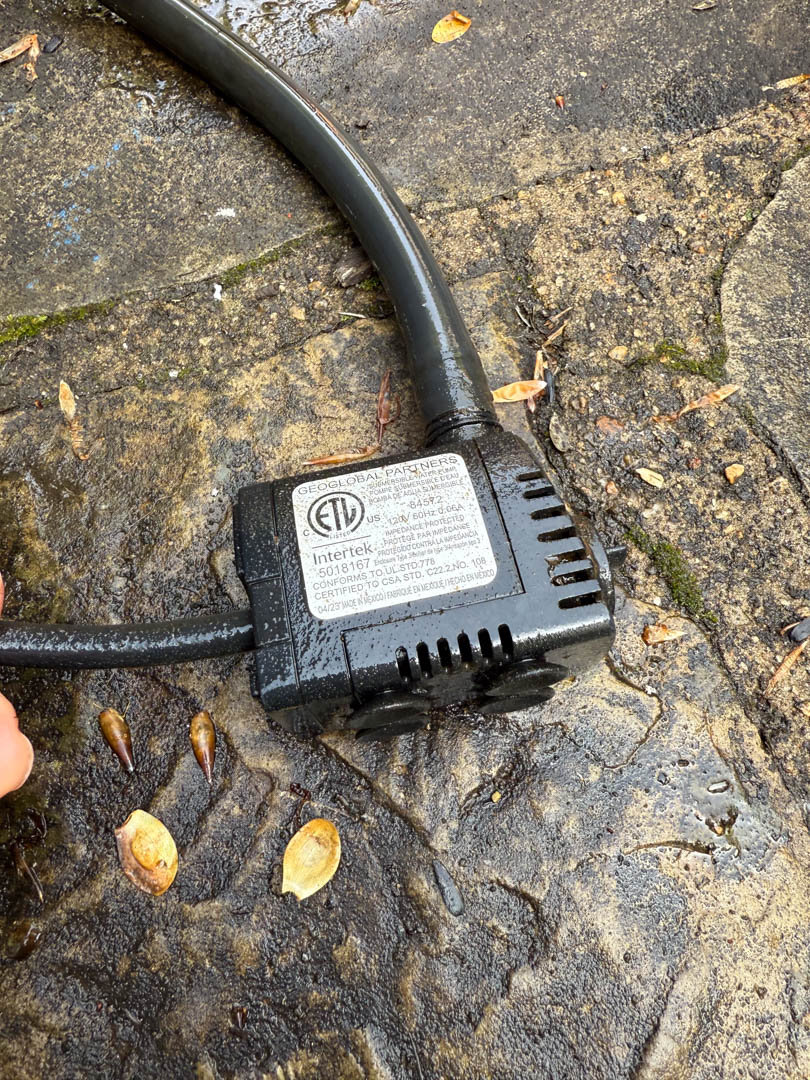
- Simple pond water pump (Available at Lowes, Home Depot, a pet store, or on-line)
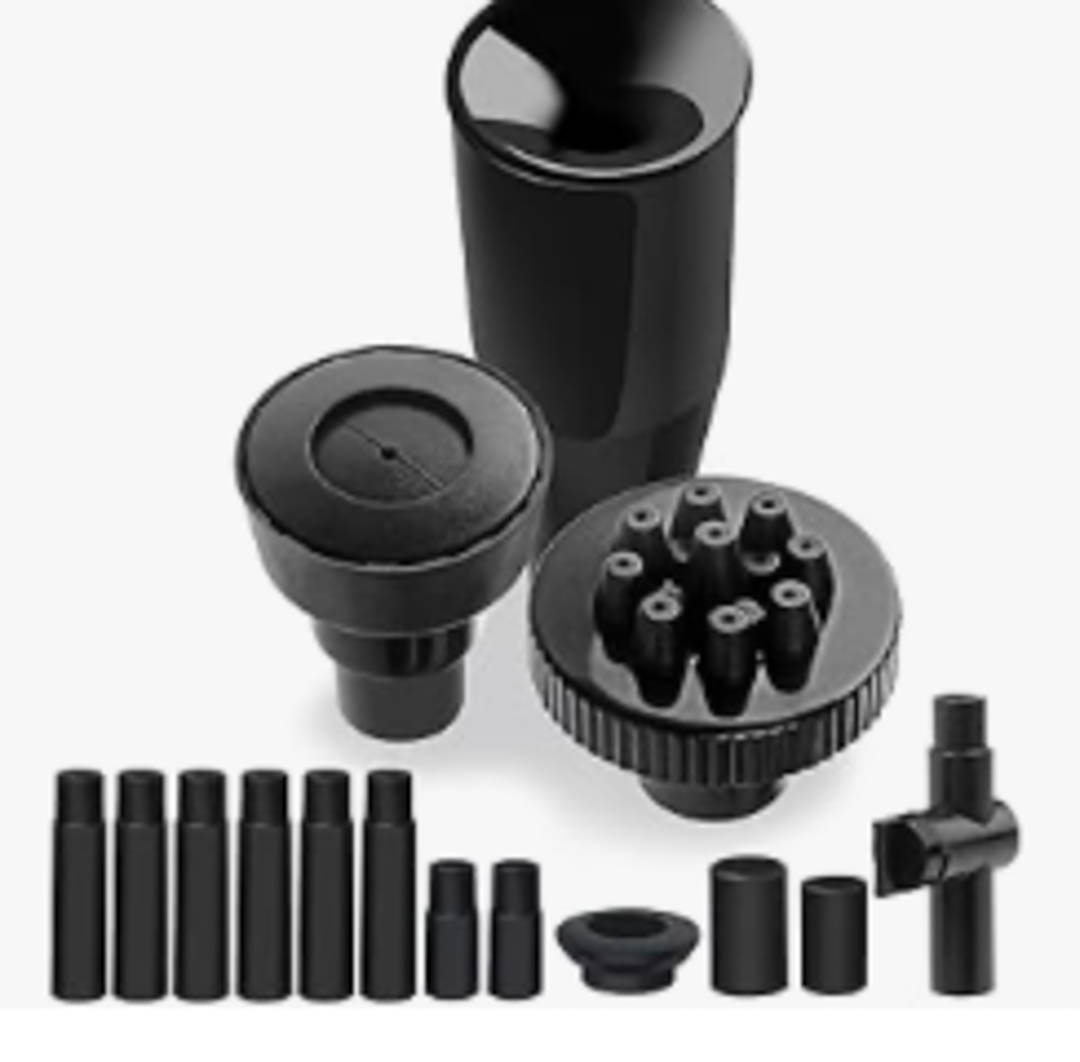
- One, or an assortment of nozzles. These have the same diameter as the hose from the water pump.
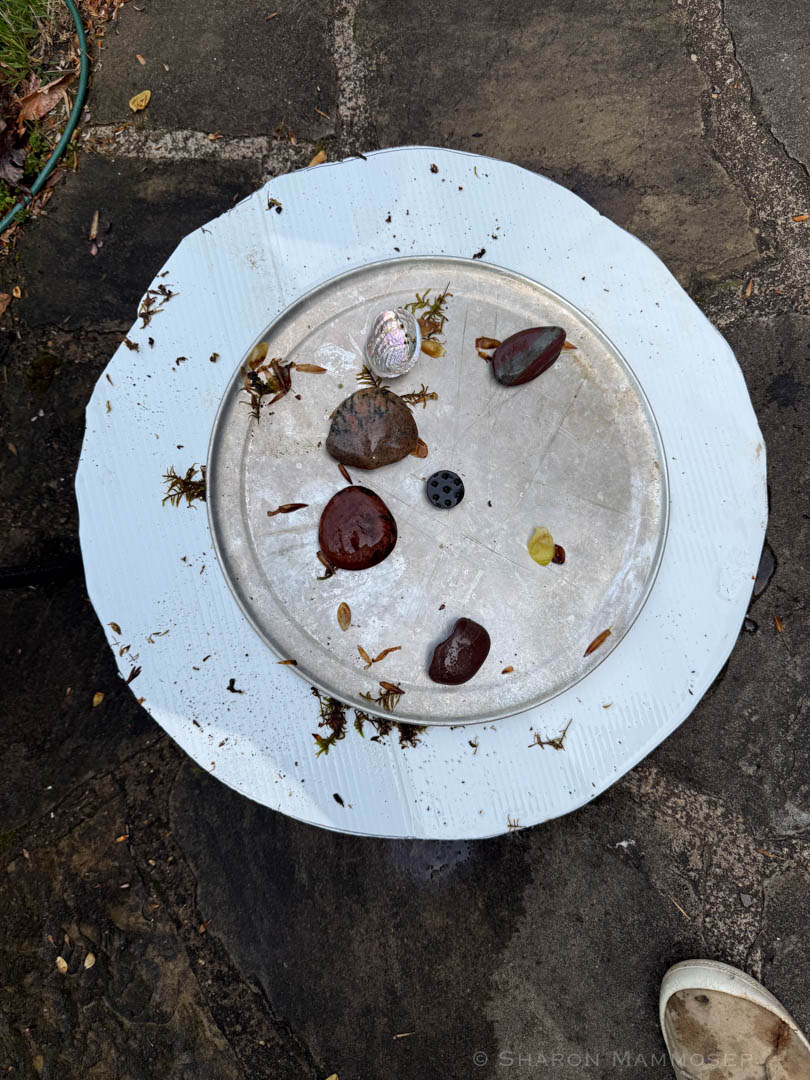
- large piece of corrugated plastic (24×36) blank signs OR a pizza pan that is exactly the diameter of your pot and will rest inside at the top, on the natural lip of the pot.
- drill
- Exacto knife or sharp scissors
- water
- an extension cord
- power source
- steel wool (optional)
- screw driver
Optional: Moss, small rocks, shells
Directions and Notes:
–It is possible to make this with a pizza tray instead of the corrugated plastic, but it must be the exact size of the top of the pot, and must sit in a natural lip on the pot. I used corrugated plastic because it is easy to trim off a tiny bit at a time after I cut my circle, so I can get it to sit tightly in the pot at the height I desire– about two inches from the top of the flower pot.
–I actually just used the nozzles that came with the solar fountain that burned out when the water was sprayed out of the pot for too long. However, you can buy nozzles on line, and maybe at a home goods store.
— I did three versions, so if I added up all of that, it would be fairly expensive. But if I did it this last way the first time, it would have cost less than $100 — about $60, as I already had a suitable extension cord. The nozzles are about $10, pond pump around $12-15, flower pot about $35 depending on which one you choose, and plastic corrugated sign about $12. I bought mine at Lowes where you can buy just one.
- Lay the corrugated plastic on the ground.
- Set the flower pot upside-down on top and trace the top opening.
- Using the exacto knife or scissors, cut the circle so it is the same size as the pot opening.
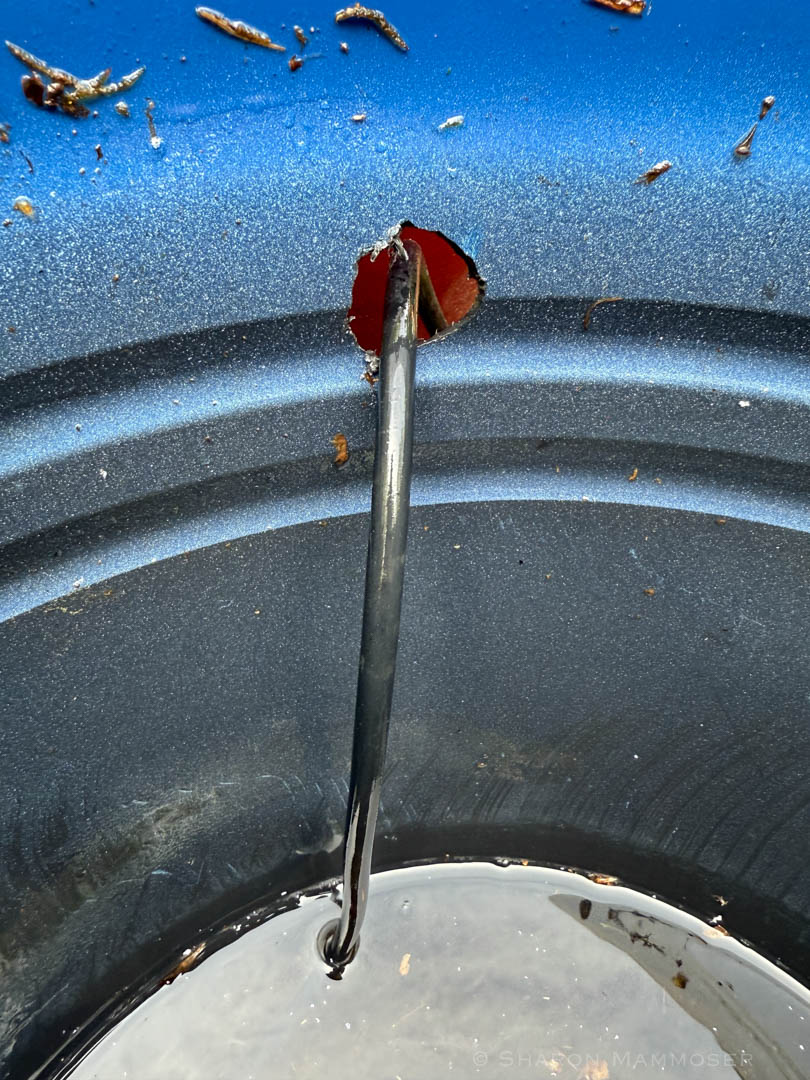
- Using a drill, make a hole near the top of the pot, about two inches from the top. This needs to be just big enough so the pond pump power cord can emerge from the hole and plug into the extension cord. Don’t make it a lot larger than it needs to be or you will have mosquitoes laying eggs in the pot water. If you make it too big, use a bunch of steel wool to fill the hole and prevent mosquitoes from entering the pot.
- Position the pond pump in the bottom of the pot and suction cup it to the side. The higher you suction cup it, the higher the spray will reach above the top of the pot. You don’t need it to spray more than one or two feet.
- Feed the pump hose towards the top and then put it through the corrugated plastic.
- Position one of the nozzles onto the top of pump hose–on top of the corrugated plastic. This can be challenging and may require you to bend the hose with a screw driver or other tool in order to get it in. The nozzle should fit tightly, and should be on top of the plastic (or pizza pie tin)
- Thread the power end of the pump out through the hole at the top of the pot.
- Fill the pot with water, stopping just below the hole you made in the pot.
- Gently set the plastic circle with the nozzle in the center on the top of the pot opening. If you cut it perfectly it should sit at the top, not falling into the pot. You may need to trim in various places so it sits at the top, about an inch below the top rim of the flower pot. You want to have only a small amount of water sitting on the plastic, otherwise, the hummingbirds will be afraid to sit in it. I had to drill a small hole beside the middle hole to let some water drain out. You will have to experiment with this to get it just right. Start with a small hole, and go from there, as obviously, if you drill a hole that’s too big, all of the water will drain out and there will be none sitting on top for the birds.
- Connect the pump cord to an extension cord and plug it into an outlet.
- See what happens, and adjust. This may mean you have to trim the plastic more, or position the pump near the bottom of the pot.
- Add moss around the edges if you can get it.
- Place a few small rocks or shells in the water so the hummingbirds have somewhere to sit.
- Enjoy!!
Please get in touch with me if you make this! I’d love to hear about your experience and how much you are enjoying the birds enjoying your hummingbird fountain! Good luck! Let’s talk.
I’m hooked Sharon. Will have to attempt this. Will let you know if I succeed.
Joan, am so excited to hear it! Please get in touch if you need help or resources. I have several wonderful cookbooks, and lots and lots of chefs I follow on Instagram who offer great recipes! Maybe it’s time to meet for lunch?