
I could (and maybe will) write a book about all of the changes you could make in your yards to attract more birds. The list is LONG! Some include:
Stop using pesticides! Choose native plants! Shrink your lawn, providing HABITAT, not sod/grass/lawn. Welcome moths and other insects and most importantly, Leave your leaves.
But this post is not about all of those! Instead, it’s about adding a simple water feature in your yard that will attract more birds. It’s not a traditional bird bath, although yes, a water feature like a bird bath WILL bring in birds. Instead, this is a fountain, or bubbler feature that’s a Do It Yourself project for a rainy day.
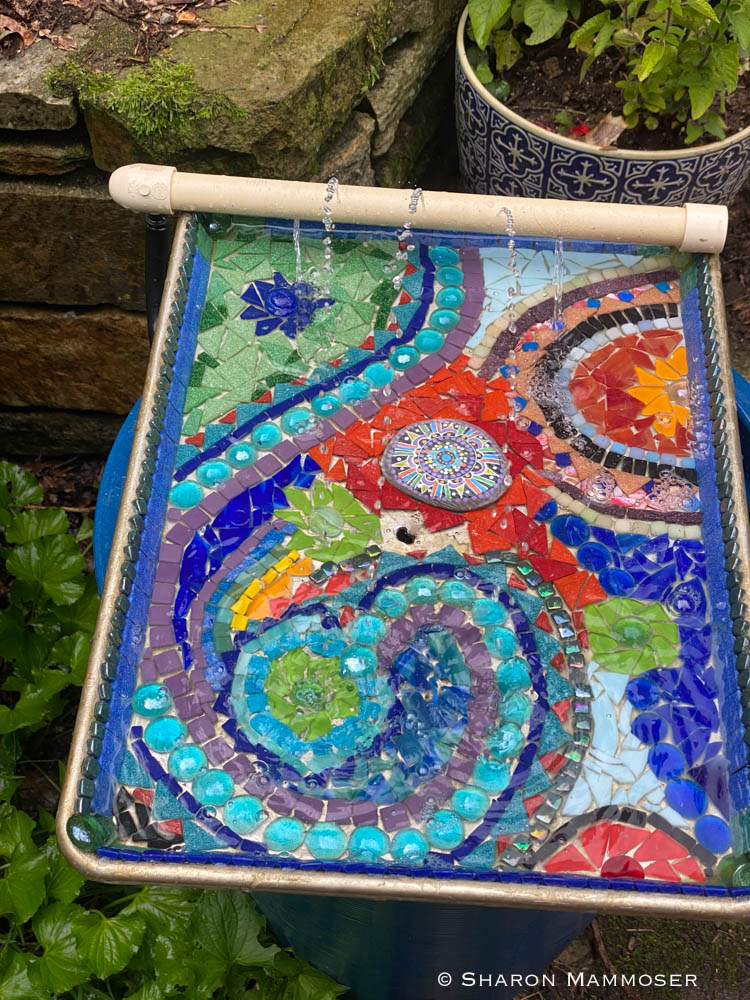
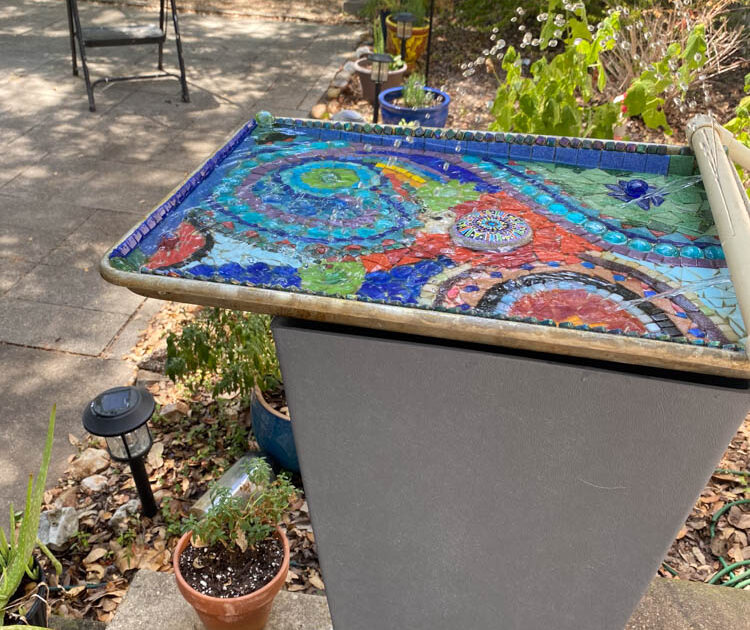
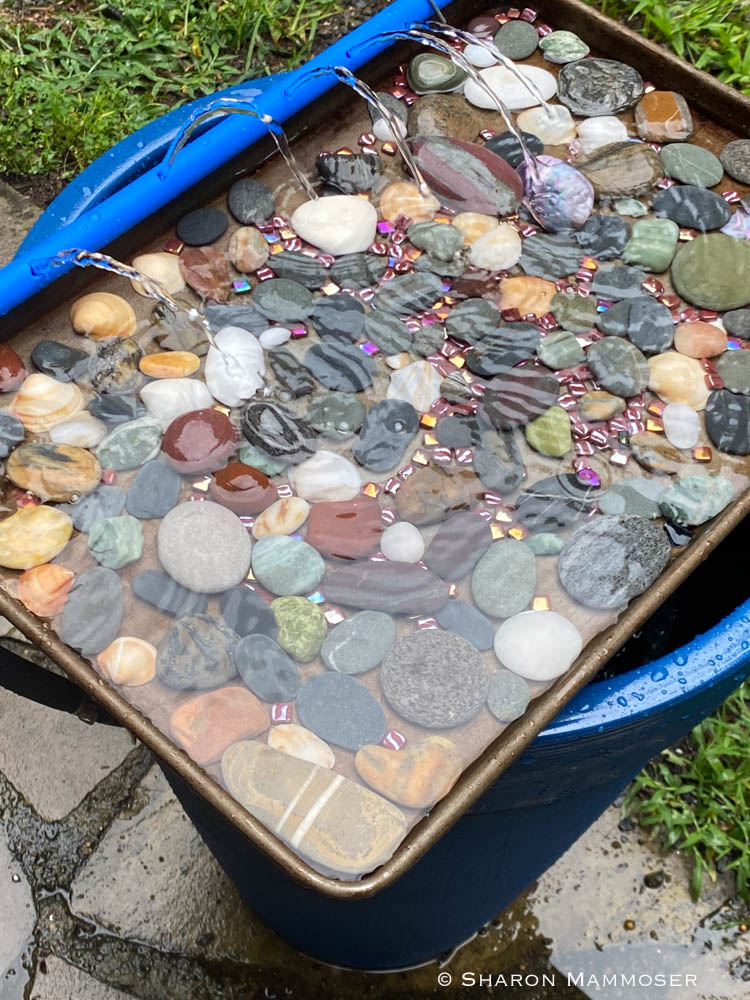
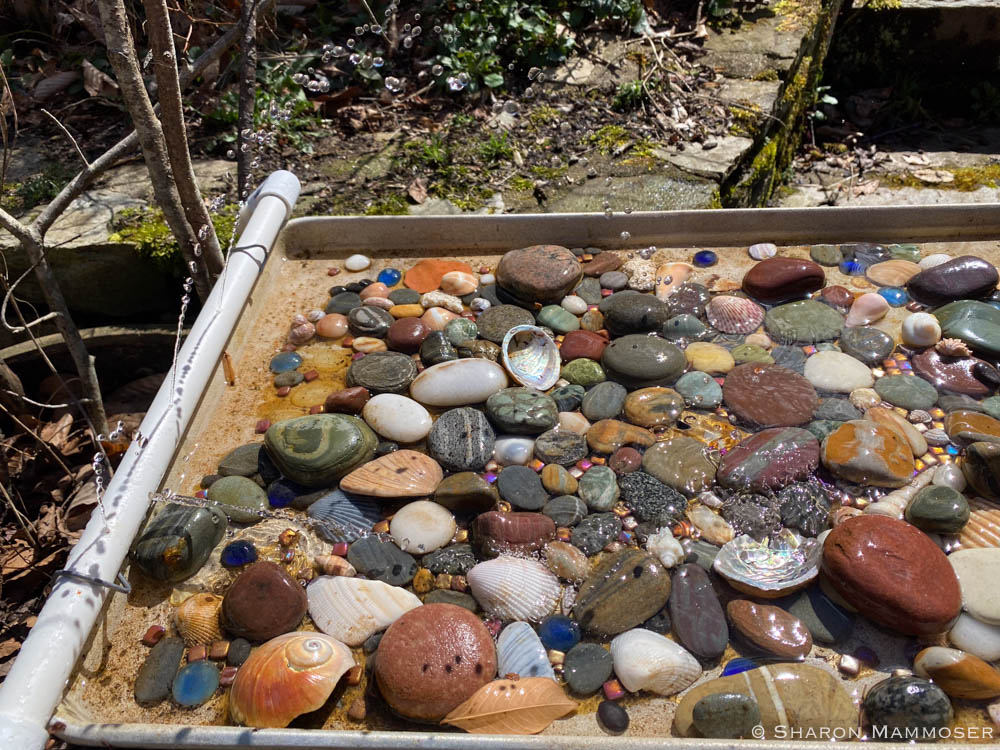
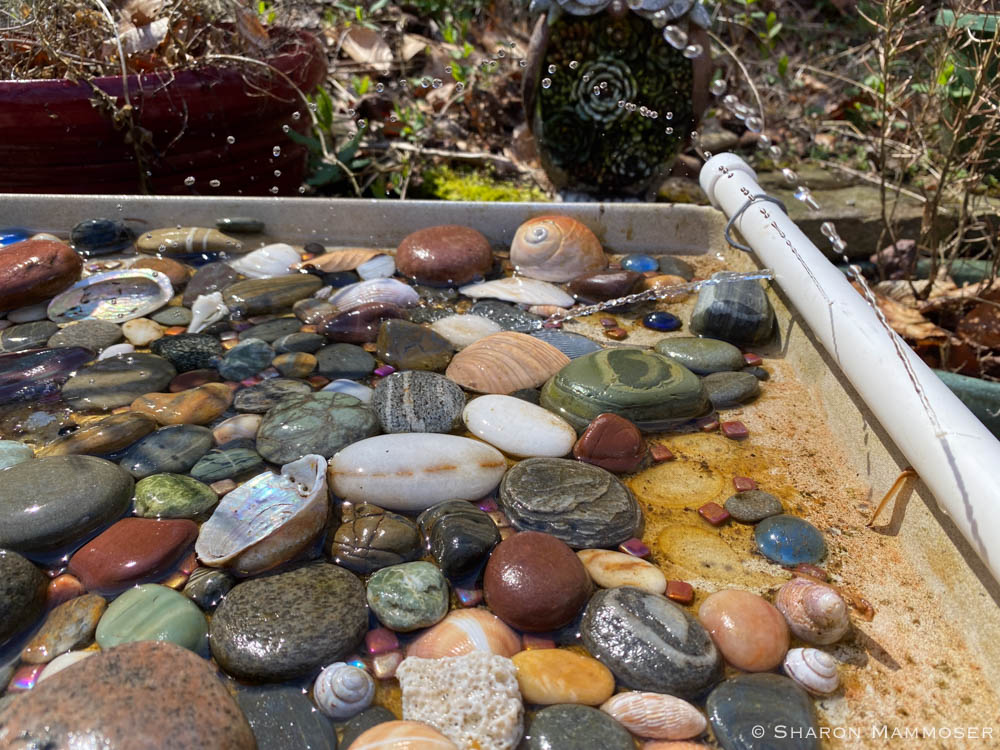
Last summer I made two what I call “The Bird Theme Park,” or the “Bird Bubble Baths.” Each consisted of a shallow baking tray that I’ve added tiles, rocks and shells to and then attached a hose and a water pump to it, set it on top of a decorative pot and put it out near my native plants. In the summer the hummingbirds were attracted to it, flying through the spray of water. Other birds came to drink from it, and even bathe in it. In the fall when the migrating warblers were coming through on their way to Central and South America, they often stopped in our yard and were sometimes spotted at this Theme Park. Gurgling water attracts birds!
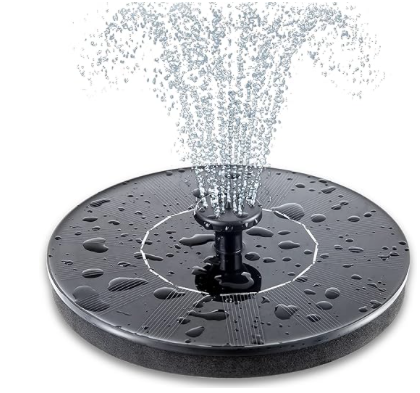
There are lots of solar fountains available online, including expensive bird baths that have multiple levels and then on the other end of the spectrum, $12-20 solar fountains like the one below that just float in a bird bath. These collect sunshine and use that energy to spray water up through the middle of the contraption into your bath. I have tried 5 or 6 of these and sadly, I’m here to report that all of them, even when I anchored them into the middle of my deepest birdbath, eventually sprayed ALL of the water OUT of my bird bath, emptying it in a matter of time. If you don’t notice this right away, the pump in the fountain burns out and dies. As another negative feature of these is that they only work when it is a sunny day.
Tired of constantly having to refill my birdbath, I I opted to create my own, very unique and beautiful Bird Theme Park. With a few materials, some creativity and a bit of time, you can too!
Here’s what you’ll need to create a DIY bird bubbler fountain:
Materials
- Shallow baking tray, like a square or rectangular tray as those for cookies. My tray is 16×24.
- Rocks, tiles, shells, beads or other materials to decorate the baking tray
- Tile adhesive
- A drill with a variety of small drill bits
- Plastic tubing
- One end cap, and one elbow of the same diameter as your PVC pipe (various diameters will be available, including some that are already colored.)
- A short section of PVC pipe, mine is 18 inches.
- A simple water pump, like one for a fish tank. (You could use a solar pump, or if an outlet is present, an electrical one) You don’t need the most powerful one. Cost is between $12-25.
- A decorative pot (choose a material that is easy to drill a hole in. Ceramic might not be best.) or even a bucket. This must be big enough that the pan you’ve chosen sits easily and firmly on top of the bucket and should not be so wobbly that it can fall off. Match the size to the footprint of the baking tray.
- Metal wire in short two inch segments (For securing the pipe onto the tray)
- Wire cutters
- Plyers
- A hacksaw or Ratchet-Type Cutters (For cutting the PVC pipe)
Method:
- If you’re choosing to decorate a baking tray, do this step first.
- Lay out your rocks/tiles/marbles, etc in the design you want. Be sure and leave a one inch hole near the center, or edge of the pan. This will be where the water drains back into the bucket/pot. It can be on the edge, or in the center. For now, just don’t glue rocks/tiles/marbles in this place. You can’t drill the hole now– you must wait until after the PVC piping has been drilled and tested.
- Use the adhesive you prefer. (cement based or one that comes from a squeezable tube.) Be sure and read the label to make sure this will last when under water! Use your adhesive to place and glue your tiles/rocks/shells onto the pan. Work in small areas to prevent the adhesive from drying out. If you’re using tiles, you may want to grout between tiles. Or, place tiles touching each other and skip the grout.
- After you’re happy with the tiles, allow the glue/adhesive to dry for the indicated time.
- Next drill a hole a little larger than the diameter of the plastic tubing, near the top of the pot.
- Lay your PVC tubing across the baking tray in the orientation you want. You can shoot the water the long way, or the short way. I made one each way. The longer way allows the water to spray farther but the shorter way allows for more holes. It’s up to you! Both ways will work.
- Cut the PVC tubing two inches longer than the length of your baking tray.
- Measure out the number of holes you want for the water to spray from. In my 18 inch section of PVC, I had 3 holes, plus an outlet hole to relieve some of the pressure so the spray didn’t shoot out of the tray. Start with less and add more if you want. The more holes you have the less pressure and less distance the water will spray. This might be good as if it sprays too far, it will spray out of your tray.
- Holding the PVC piping against a solid surface with one hand, use the other hand to drill your holes. The more holes you drill, the less water pressure there will be and the shorter the distance the water will spray. Start with a small hole– you can always make them bigger but you can’t make them smaller. Try to use the same angle for all of the holes, otherwise your water will not be uniform when sprayed and may shoot out at an angle, thus out of your tray.
- After drilling the holes, lay your PVC piping onto the baking tray with the holes facing the tray. Angle the holes so the water will create an arch, landing a good distance from the PVC and not too close to the opposite edge. You don’t want the water spraying out of the tray or you will have to be constantly refilling the holding pot.
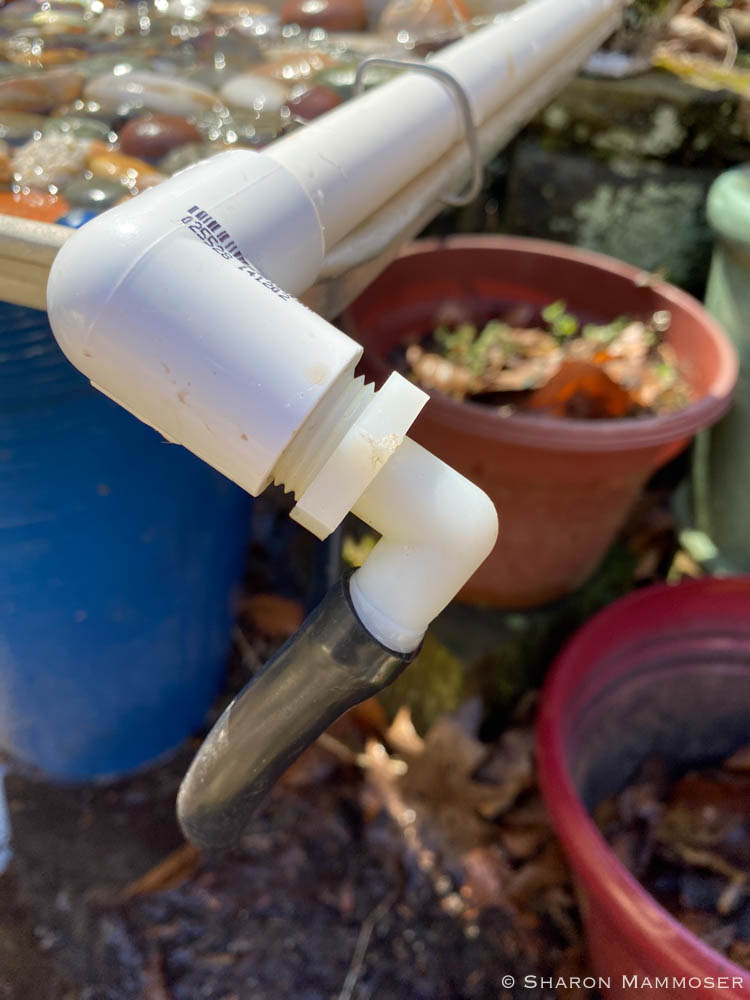
- Connect the tubing to the water pump and then, at the other end, connect the tubing to the elbow.
- Connect the elbow to the PVC pipe and secure the cap onto the other end of the PVC pipe. Both ends should now be sealed.
- Fill your pot with water and feed the plastic tubing for the pump into the hole you drilled at the top.
- Plug in the pump.
- This is the hardest step! As now you have to experiment to get the spray correct. If it is too powerful, or sprays too far, you will lose all of your water in no time. Aim for the water to spray into the center or far end, but not too close to the edge. You’ll have to experiment to get it right. You can change any of the following factors to change the spray output:
-
- Lower or raise the pump in the pot
- Shorten or lengthen the plastic tubing
- Make the holes in the PVC pipe larger
- Drill more holes
- Add an outlet hole– this is a hole that is positioned below the other holes, and is larger, intended to let some of the water run out here and lessen the pressure going though the other holes.
-
- Create your drain hole. After you’ve got the spray the way you want, drill a small hole where you want the water to drain into the pot. This could be in the center, or at the edge. Start small.
- Allow the water to spray onto the pan. Your goal is for no water to fall over the edges of the baking tray. You’ll have to keep adding to the drain hole to get this right. You want the water to spread out in the pan but remain shallow. If you drill too large of a hole there will be too little water left for the birds to drink or bathe in. If you drill too small of a hole there will be too much water and it will leak over the pan’s edges. You want the perfect balance, so doing a little at a time is key to getting this correct. After you’re happy with the size of the hole, you can dry things out and add more rocks/tiles/shells to the edge of the drain hole if you desire.
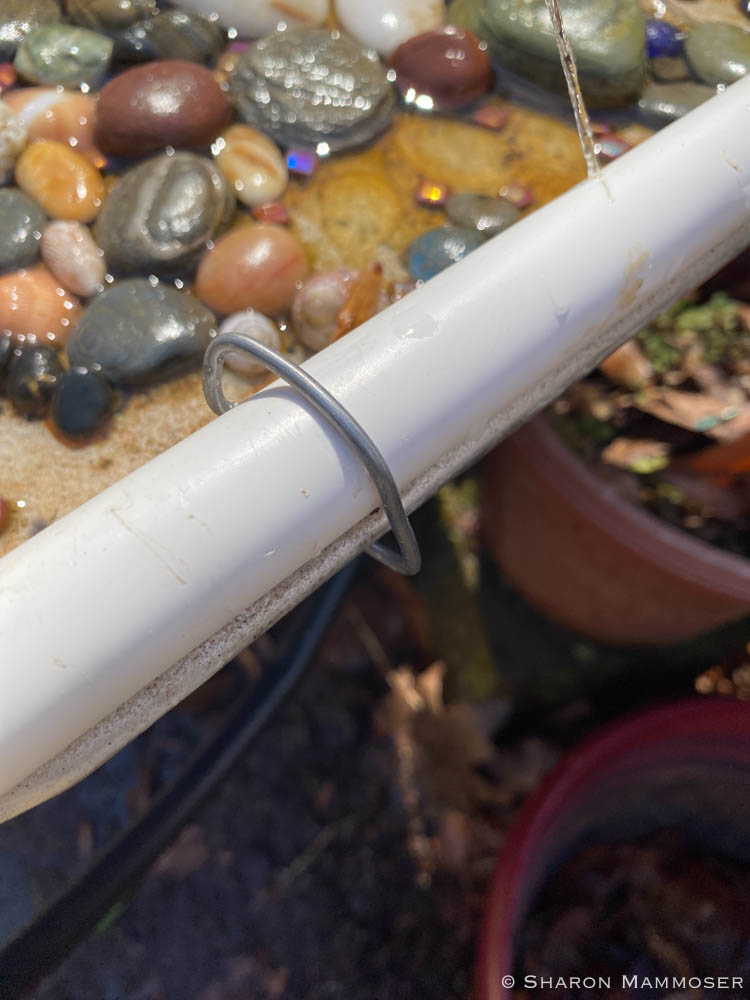
- Using the pliers, bend the wire around the PVC tubing to secure it to the edge of the baking tray. This is challenging but needs to be done. Otherwise the PVC tubing will inevitably get knocked out of wack and your water will shoot out of the tray.
Extra Notes:
I learned a lot making several of these “bird theme parks.” I can save you some time by sharing some of those things.
- If I had it to do over I might paint the tray before adding tiles or stones. There are outdoor paints that would work for both the tray and the PVC tubing. This would make it less amateurish looking.
- Test the adhesive you choose ahead of time. They are not all created equal and some discolored the pan and make it look messy. Next time I would test a bunch of adhesives out or seek reviews from someone who has tried them.
- Drill your hole for the plastic tubing as close to the top of the pot as you can. Otherwise, the distance from the drain hole to the top of the water may be far enough that instead of hearing gurgling water, you hear the water draining and hitting the water below. Not terrible, but not ideal either.
Now you’re ready to go! Turn on your Bird Water Park and wait for the birds to find it! I hope you’ll let me know what you attracted and maybe even get some photos. I’d love to hear from you!