Welcome to my behind the scenes page. Did you arrive here after seeing my work at The North Carolina Arboretum?
I am sure I am not the first photographer to play with my images in the digital darkroom and “discover” some pretty interesting effects. One of my favorite ones I call “The Kaleidoscope Effect.” Depending on the original image, the end result of this can be spectacular and often, in my eyes anyway, more interesting that the simple original photo. Have you seen my show at The Arboretum? Or looked at my Gallery with images from this effect? If you’re curios about how I do this, you’ve come to the right place.
Here’s how I create these images:
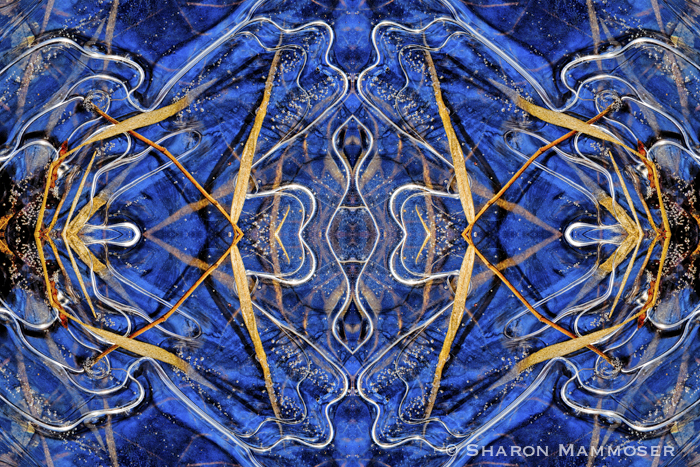
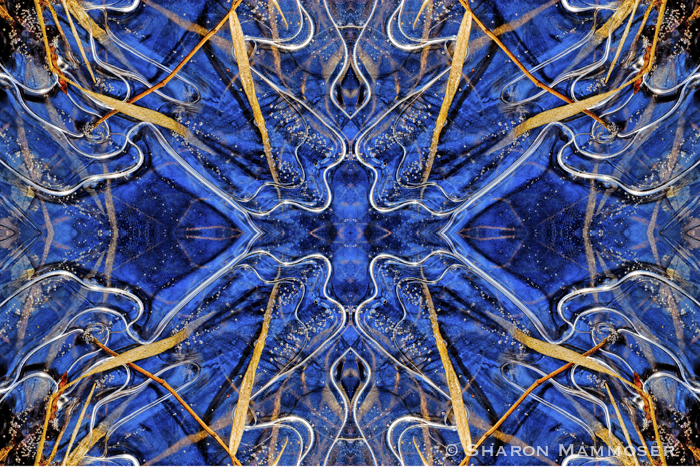
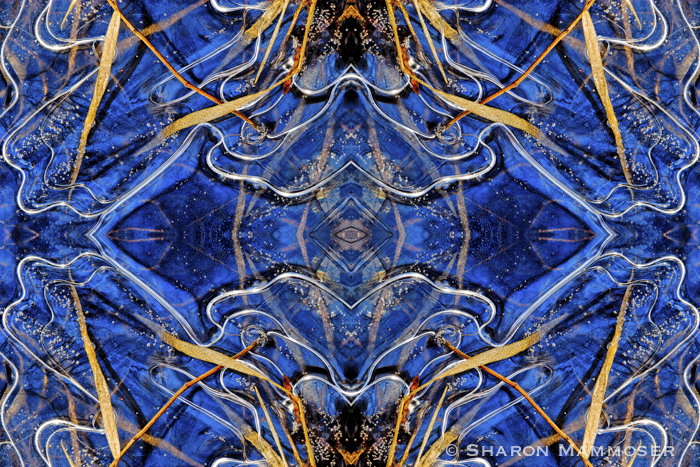
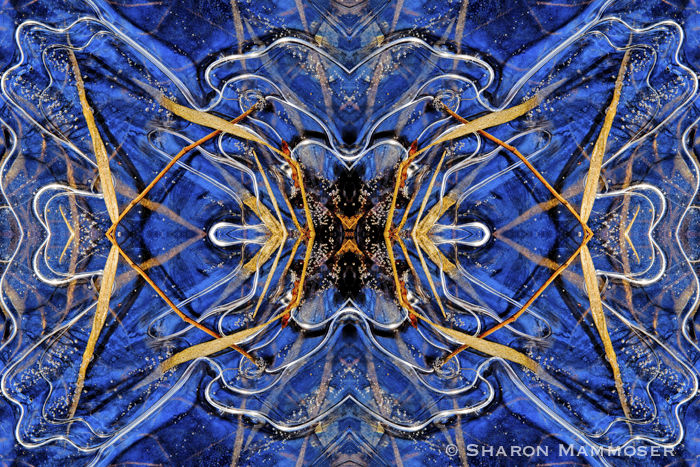
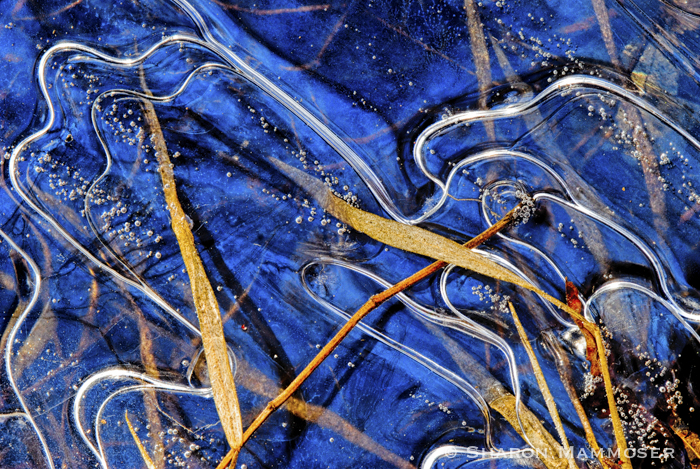 1. Choosing an appropriate image for this is key. Many images do not work very well as a Kaleidoscope, though there is of course no right or wrong way. Art is in the eye of the beholder after all. For me, I seem most pleased with the effect when the original is a bit abstract to start with, like this image ice with reeds on top and under the ice as well as trapped air that has formed bubbles and lines in the image.
2. I then create a blank image that will be my template. This could be a square of a long, panoramic shape or whatever size I want the end image to be.
 3. I place the first image in the upper left, in the orientation I want. For every image, there are four choices–as is, mirrored, mirrored and flipped, and flipped.
4. Assuming I am creating a rectangular collage (as opposed to a long panoramic) I then duplicate the original image, setting it beside the first one. I then flip it so the original image is mirrored beside it.
 4. Next I move to the bottom right corner, duplicating the image above it and then mirroring it.
5. I duplicate that and then mirror it again, setting it tightly beside the other two images.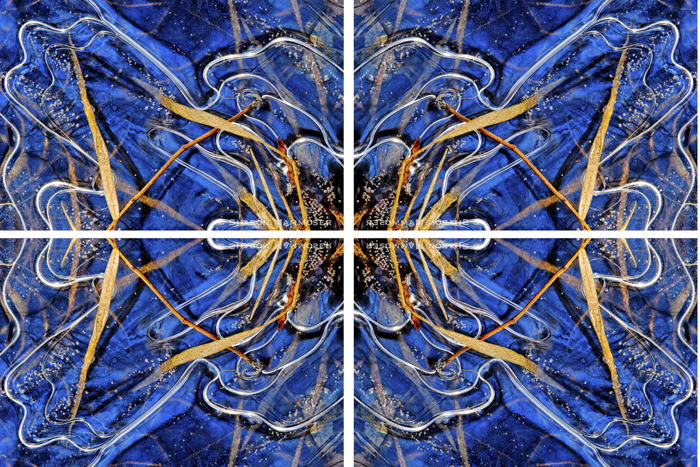
6. My last step is to perfectly line up all the patterns within the collage. This step is critical as if the lines within the image don’t meet perfectly, the result will be distracting.
7. I survey the final result and decide whether or not I like it. Much of the time, the answer is no, in which case I go looking for another image, or try the same image again, using a different orientation at the start.
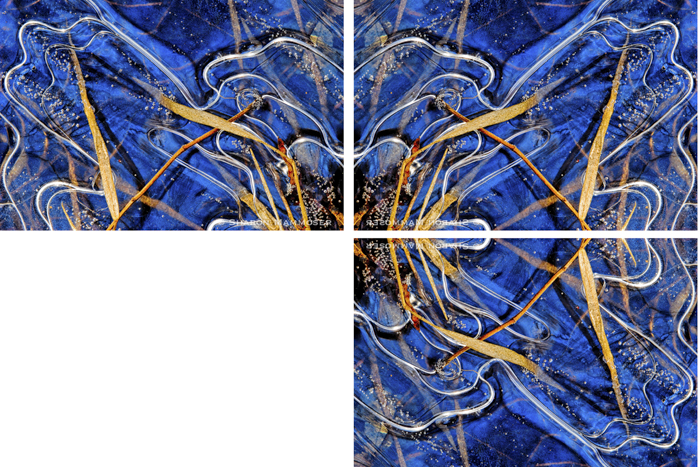
Here is an example of 4 images from the same picture. The difference is in how I oriented the first image. Which one do you like the best? If you’d like, let me know! I’d love to hear from you.